반응형
wpf처럼 테마 적용법을 찾아내고 싶었으나 잘 안된다. 대신 material skin을 적용하면 쉽게 화면 스타일을 바꿀 수 있다.
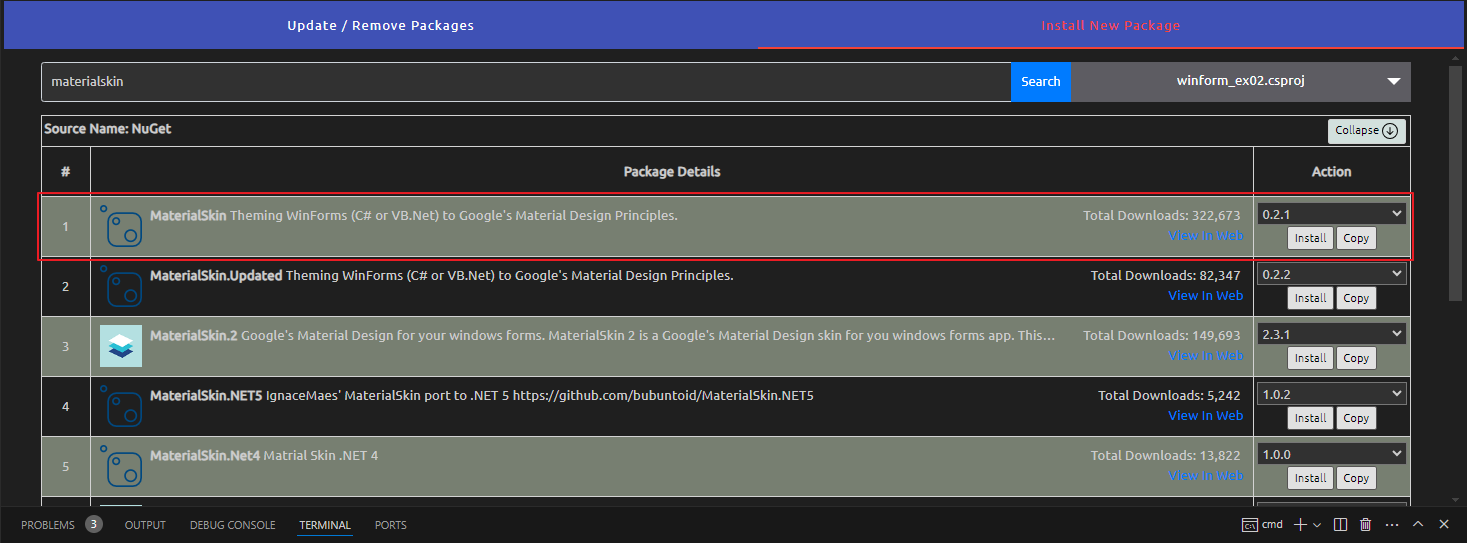
1. NugetPackageManager GUI 설치
2. MaterialSkin 설치
- VSCode에서 Ctrl+Shift+P ->Nuget Package Manager GUI에서 materialskin 검색
3. Form1.cs 파일에 적용
namespace winform_ex02;
using System;
using System.Text;
using System.Xml;
using MaterialSkin; 	//추가
using MaterialSkin.Controls;	//추가


// public partial class Form1 : Form
public partial class Form1 : MaterialForm
{
    public Form1()
    {
        InitializeComponent();
        // 아래 추가
        var materialSkinManager = MaterialSkinManager.Instance;
        materialSkinManager.AddFormToManage(this);
        materialSkinManager.Theme = MaterialSkinManager.Themes.DARK;
        materialSkinManager.ColorScheme=new ColorScheme(Primary.BlueGrey900, Primary.BlueGrey900, Primary.BlueGrey500, Accent.LightBlue200, TextShade.WHITE);
		// 여기까지

        // 이하는 버튼 클릭 이벤트...
        this.button1.Click += new System.EventHandler(this.button1_Click);
    }

    private void button1_Click(object sender, EventArgs e)
	{
		OpenFileDialog openFileDlg = new OpenFileDialog();
		openFileDlg.Filter = "XML Files (*.xml)|*.xml";
		openFileDlg.ShowDialog();
		// MessageBox.Show("Hello World!");
		if (openFileDlg.FileName.Length > 0)
		{
			foreach (string Filename in openFileDlg.FileNames)
			{
				this.textBox1.Text = Filename;

				XmlDocument xmlDoc = new XmlDocument();  // XmlDocument 객체 생성
				xmlDoc.Load(Filename);                 // XML 파일 로드
				XmlNodeList allNodes = xmlDoc.SelectNodes("//bookstore//*");
				StringBuilder sb = new StringBuilder();

				foreach(XmlNode node in allNodes){
					if(node.NodeType == XmlNodeType.Element){
						sb.Append(node.InnerText);
					}
					else if (node.NodeType == XmlNodeType.Text){
						sb.Append(node.Value );
					}
					// sb.Append("\n");
					sb.Append(Environment.NewLine);
				}

				this.result1.Text = sb.ToString();
			}
		}
	}
}
ColorScheme클래스의 생성 인자
materialSkinManager.ColorScheme=new ColorScheme(Primary.BlueGrey900, Primary.BlueGrey900, Primary.BlueGrey500, Accent.LightBlue200, TextShade.WHITE);
// 인자1 `Primary.BlueGrey900`: 테마의 기본 색상. 메인 강조 색상. 진한 청회색.
// 인자2 `Primary.BlueGrey900`: 보조 색상으로 호버 색상. 초점 색상.
// 인자3 `Primary.BlueGrey500`: 3차 색상. 배경색 or 은은한 그림자 색상으로 가끔 사용됨.
// 인자4 `Accent.LightBlue200`: 버튼, 링크 등 강조 색상. 연한 파란색
// 인자5 `TextShade.WHITE`: 텍스트 음영
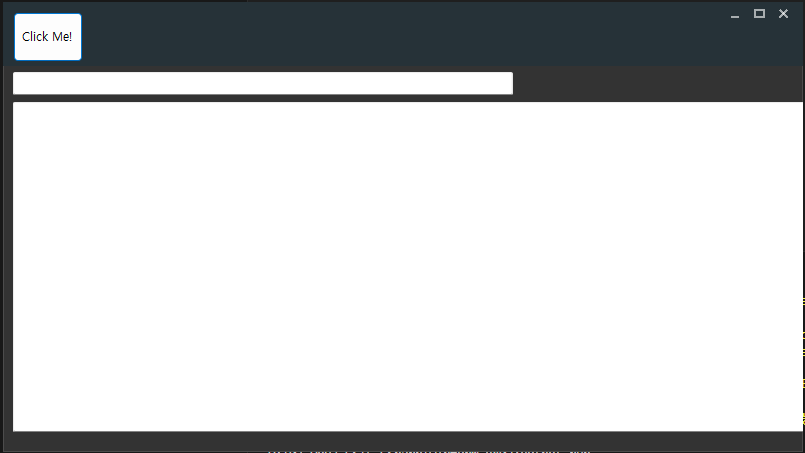
4. Form1.Designer.cs (버튼 클릭 이벤트/폼 예제)
namespace winform_ex02;

partial class Form1
{
    /// <summary>
    ///  Required designer variable.
    /// </summary>
    private System.ComponentModel.IContainer components = null;

    /// <summary>
    ///  Clean up any resources being used.
    /// </summary>
    /// <param name="disposing">true if managed resources should be disposed; otherwise, false.</param>
    protected override void Dispose(bool disposing)
    {
        if (disposing && (components != null))
        {
            components.Dispose();
        }
        base.Dispose(disposing);
    }

    #region Windows Form Designer generated code

    /// <summary>
    ///  Required method for Designer support - do not modify
    ///  the contents of this method with the code editor.
    /// </summary>
    private Button button1;
    private TextBox textBox1;
    private TextBox result1;
    private Panel panel1;
    private void InitializeComponent()
    {
        this.components = new System.ComponentModel.Container();
        this.AutoScaleMode = System.Windows.Forms.AutoScaleMode.Font;
        this.ClientSize = new System.Drawing.Size(800, 450);
        this.Text = "Form1";

        // 버튼 컨트롤 생성 및 설정
        this.button1 = new System.Windows.Forms.Button();
        this.button1.Location = new System.Drawing.Point(10, 10);
        this.button1.Name = "button1";
        this.button1.Size = new System.Drawing.Size(70, 50);
        this.button1.Text = "Click Me!";
        this.button1.UseVisualStyleBackColor = true;
        // this.button1.Click += new System.EventHandler(this.button1_Click);  // 클릭 이벤트 핸들러 등록

        // 버튼을 폼에 추가
        this.Controls.Add(this.button1);

        // 텍스트 박스 생성 및 추가
        this.textBox1 = new System.Windows.Forms.TextBox();
        this.textBox1.Location = new System.Drawing.Point(10, 70);
        this.textBox1.Name = "textBox1";
        this.textBox1.Size = new System.Drawing.Size(500, 500);
        this.textBox1.Text = "";
        // this.textBox1.UseVisualStyleBackColor = true;
        this.Controls.Add(this.textBox1);

        // 패널 생성 및 추가
        this.panel1 = new System.Windows.Forms.Panel();
        this.panel1.Anchor = ((System.Windows.Forms.AnchorStyles)(((System.Windows.Forms.AnchorStyles.Top | System.Windows.Forms.AnchorStyles.Left)
            | System.Windows.Forms.AnchorStyles.Right | System.Windows.Forms.AnchorStyles.Bottom)));
        this.panel1.Location = new System.Drawing.Point(10, 100);
        this.panel1.Name = "panel1";
        this.panel1.Size = new System.Drawing.Size(1090,330);
        // this.panel1.TabIndex = 0;
        // this.panel1.Width = this.ClientSize.Width;
        // this.panel1.Height = this.ClientSize.Width;
        // this.panel1.Dock = System.Windows.Forms.DockStyle.Fill;
        this.panel1.AutoScroll = true;
        this.panel1.BackColor = Color.DimGray;

        this.Controls.Add(this.panel1);

        // 텍스트 박스 생성 및 추가
        this.result1 = new System.Windows.Forms.TextBox();
        this.result1.Name = "resul1";
        this.result1.Multiline = true;
        this.result1.Location = new System.Drawing.Point(0, 0);
        this.result1.ScrollBars = System.Windows.Forms.ScrollBars.Vertical;
        this.result1.Dock = System.Windows.Forms.DockStyle.Fill; // Dock 속성 설정
        this.result1.Text = "";

        // 텍스트 박스의 크기와 위치를 조정
        // this.result1.Width = this.panel1.ClientRectangle.Width;
        // this.result1.Height = this.panel1.ClientRectangle.Height;
        this.panel1.Controls.Add(this.result1);
    }

    #endregion
}
반응형
'Programming > C#' 카테고리의 다른 글
| C#(Winform) XML파일 읽기 프로그램 만들기 (0) | 2023.07.27 |
|---|---|
| C#(WPF) - Datagrid 멀티라인 추가하기 (2) | 2023.02.14 |
| .NET6(dotnet6)에서 entity framework 설치하기 (ef명령어 오류) (2) | 2022.09.14 |
| C#(WPF) - 실행 프로그램 아이콘 설정하기 (0) | 2022.04.22 |
| C#(WPF) 프린트 - 단순 출력부터 다이얼로그 없이 출력하기까지 (0) | 2022.01.14 |


